2026-05-12
A high-quality mold is never an accident—it’s the result of a precise, controlled machining process that combines advanced technology, skilled craftsmanship, and uncompromising attention to detail. From a raw steel block to a production-ready tool, every cut, grind, and polish matters. Below is the step-by-step breakdown of how we craft durable, high-performance molds that power your production.
Step 1: Rough Machining – Lay the Foundation
We start with premium mold steel—selected for its durability and performance—including P20, 718H, S136, H13, and other industry-leading grades. This is where the mold’s basic shape takes form:
First, the steel block is cut to approximate size using a high-precision band saw, ensuring minimal material waste.
Next, a CNC machine performs aggressive, high-speed roughing to remove the bulk of excess material quickly and efficiently.
Rough machining leaves a 0.3–0.5mm stock allowance for the finishing process, preventing over-cutting and preserving structural integrity.
Goal: Rapidly remove excess material, approach the mold’s final shape, and relieve internal stress in the steel—critical for long-term mold stability.
Step 2: Heat Treatment (If Required) – Boost Durability for High-Volume Production
For molds used in high-volume production or with abrasive materials (e.g., glass-filled plastics), heat treatment is essential to harden the steel and extend mold life:
Rough-machined steel blocks undergo vacuum heat treatment—a controlled process that ensures uniform hardness without distortion.
Cavity and core components typically reach a hardness of 48–52 HRC, making them resistant to wear and tear during millions of injection cycles.
After hardening, the steel may experience slight deformation. We address this with a tempering step, followed by wire cutting or precision grinding to restore flatness and accuracy.
Goal: Create a mold that stands up to repeated use, reducing downtime and replacement costs for your production line.
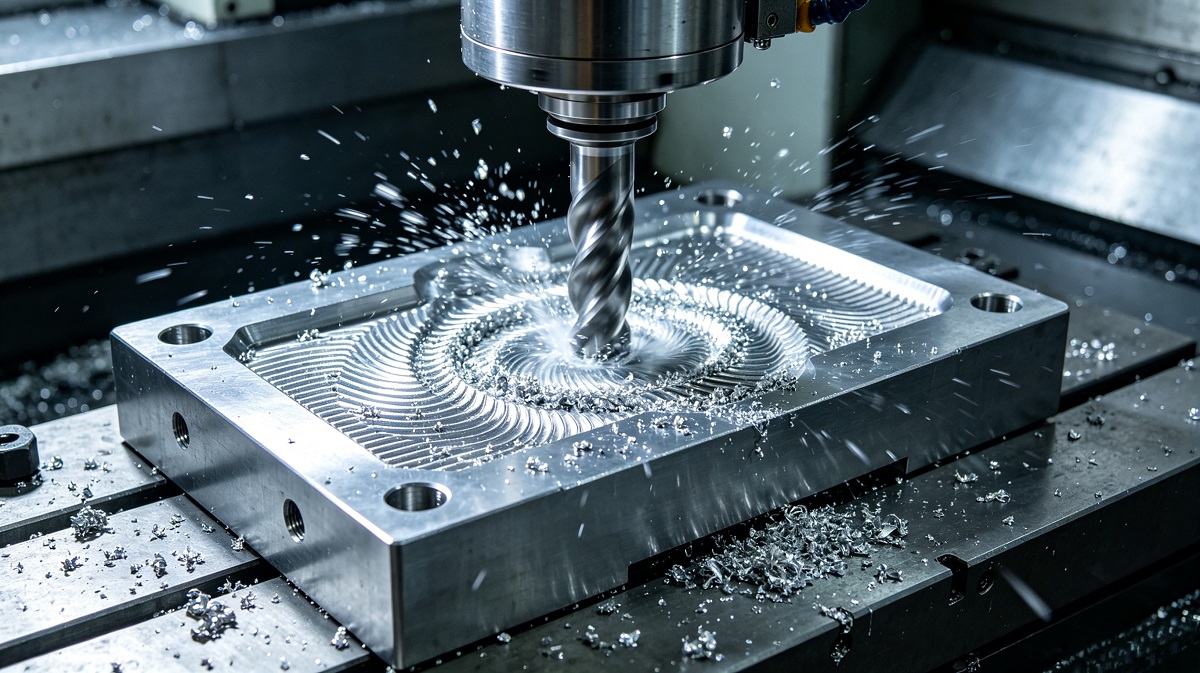
Step 3: Precision CNC Finishing – Shape with Unmatched Accuracy
Now, the mold’s detailed shaping begins—this step defines the mold’s precision and the quality of your final parts:
High-speed CNC machines equipped with small-diameter tools (down to 0.5mm ball end mills) handle intricate details with ease.
A small step-over is maintained to ensure a smooth surface finish, minimizing the need for excessive polishing later.
Complex 3D contours—including curves, ribs, bosses, and other critical features—are machined directly, eliminating the need for manual shaping.
Our skilled CNC operators work to an impressive ±0.01mm tolerance, ensuring every dimension aligns with your exact specifications.
Goal: Complete 95% of the cavity and core shaping with tight dimensional accuracy and a high-quality surface finish.
Step 4: EDM (Electrical Discharge Machining) – Master the Unmachinable
Some mold features—sharp inside corners, deep narrow slots, fine text, or intricate details—cannot be cut with a CNC mill. That’s where EDM comes in:
A copper or graphite electrode is machined to the exact negative shape of the desired feature.
The electrode and steel workpiece are submerged in dielectric oil, which cools the process and flushes away eroded material.
Electrical sparks erode the steel into the perfect shape—no direct contact, no tool marks, and unparalleled precision.
EDM delivers sharp corners, vertical walls, and accuracy down to ±0.005mm—ideal for the most demanding mold features.
Goal: Machine the details CNC can’t reach, ensuring every feature of your mold is precise and clean.
Step 5: Wire EDM – Precision Through-Hole and Contour Cutting
For through-holes, ejector pin holes, angled splits, or contoured shut-offs, wire EDM is the gold standard for precision:
A thin brass wire (0.15–0.30mm in diameter) acts as a tiny, precise saw, cutting through steel with spark erosion (no direct contact).
Wire EDM produces perfectly straight walls, no burrs, and consistent accuracy across all through-features.
Common applications include ejector pin holes, core pin holes, slider guide grooves, and parting line inserts—all critical for smooth mold operation.
Goal: Create precise, straight, or tapered contours that run through the entire steel block, ensuring seamless mold functionality.
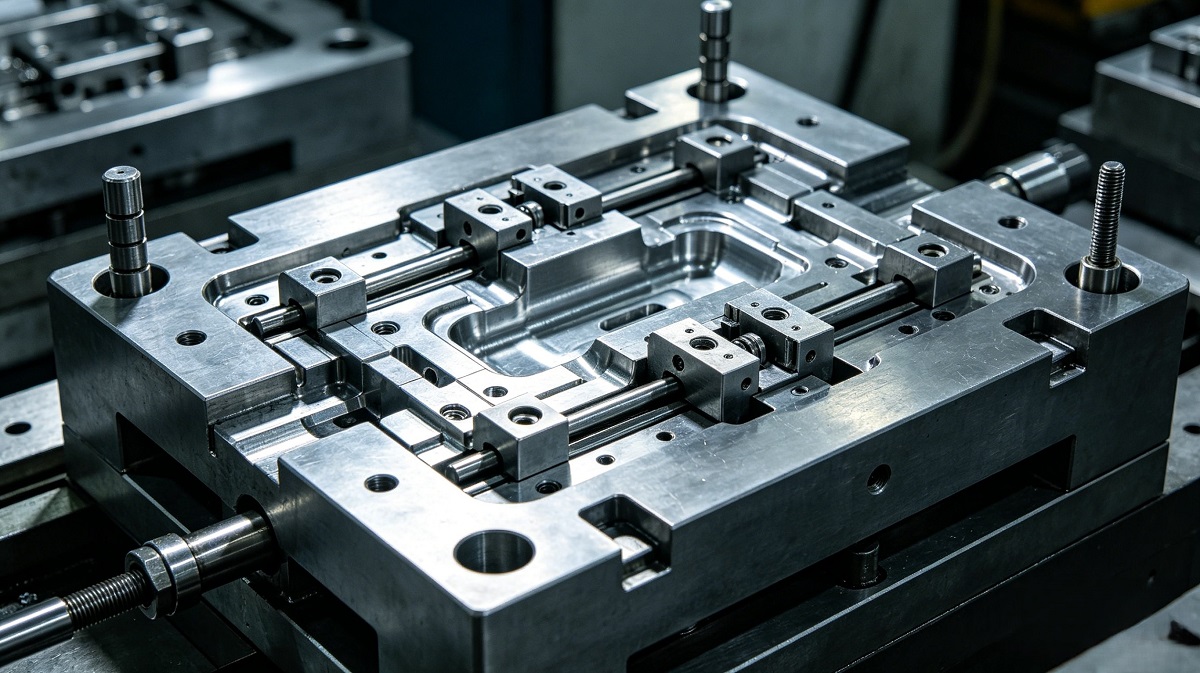
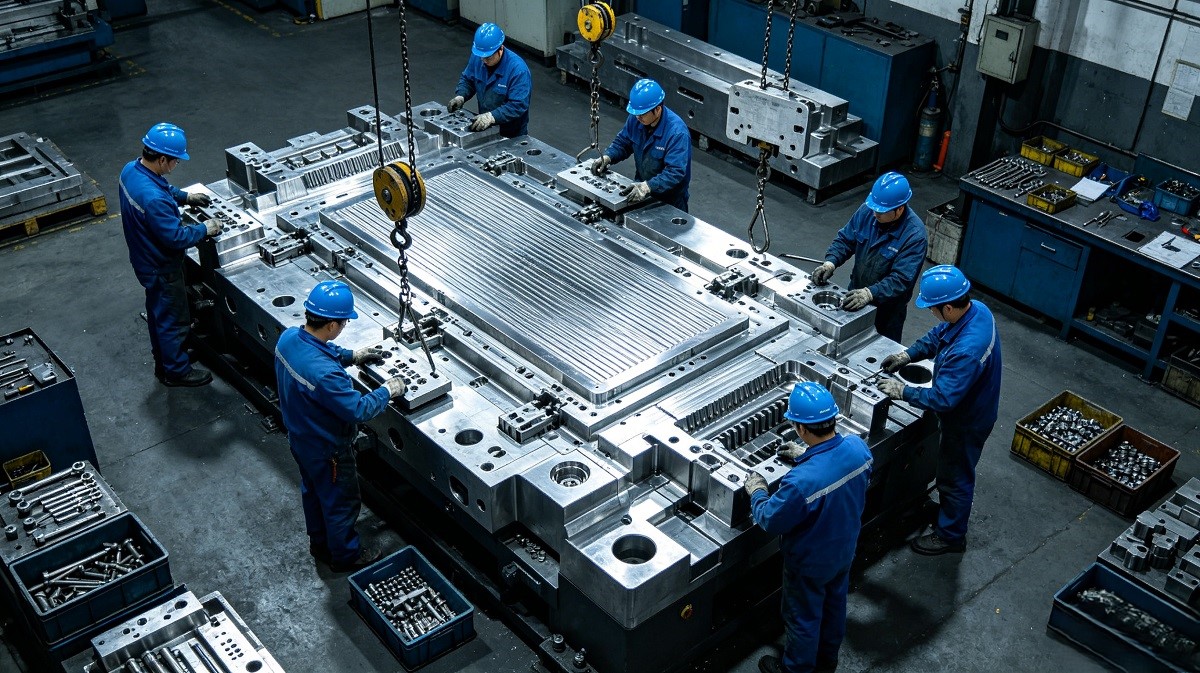
Step 6: Fitting and Assembly – Bring It All Together
At this stage, all individual mold components are ready for assembly. Our skilled mold makers meticulously fit and test every part to ensure flawless operation:
Key Components: Cavity plates, core plates, sliders and lifters, ejector pins and return pins, guide pillars and bushings.
Sliders slide smoothly without binding, ensuring consistent movement during each injection cycle.
Cavity and core close with uniform contact, preventing flash (excess material) on your final parts.
Ejector pins move freely and return flush, avoiding damage to parts or mold components.
Water channels are pressure-tested to eliminate leaks, ensuring proper cooling and cycle time efficiency.
Goal: Every moving part works in harmony. Every mating surface seals perfectly. Your mold is now ready for the final touches.
Step 7: Polishing – Define Surface Quality
The surface finish of the cavity and core directly impacts your final product’s quality, ejection ease, and mold longevity. We polish in stages to achieve your desired finish:
Stone grinding to remove all machining marks and create a uniform base surface.
Sandpaper progression from #400 up to #2000, refining the surface to a smooth finish.
Diamond paste polishing for a mirror shine (SPI-A1) when a high-gloss finish is required.
If a textured finish (leather, grain, matte) is needed, we perform chemical etching or laser texturing after polishing—ensuring the surface matches your product’s design requirements.
Goal: Achieve the specified surface finish, from standard 0.8Ra to mirror polish, for optimal part quality and mold performance.
Step 8: Final Inspection – Zero Defects, Zero Surprises
Before your mold leaves our workshop, it undergoes a rigorous inspection process to ensure it meets our highest standards—and yours. We check every critical aspect using industry-leading tools:
|
Check Item |
Inspection Method |
|
Dimensions |
CMM (Coordinate Measuring Machine) |
|
Surface Finish |
Profilometer |
|
Hardness |
Durometer |
|
Water Flow |
Pressure Test |
|
Ejection Action |
Manual 100 Cycles |
|
Slider Movement |
Manual Check |
|
Parting Line Contact |
Blueing Test |
Only when every check passes—your mold is ready for sampling and production.
Goal: Deliver a defect-free mold that performs exactly as expected, with no surprises during production.
Summary: From Raw Steel to Production-Ready Solution
Every step in our machining process is designed to build a mold that’s durable, precise, and reliable. Here’s the complete sequence:
Raw Steel → Rough CNC → Heat Treat (If Required) → Finish CNC → EDM → Wire EDM → Fitting & Assembly → Polishing → Final Inspection → Ready for Sampling
Skipping or rushing any step leads to costly issues: flash, short shots, premature mold failure, and increased production downtime. We never cut corners—because your success depends on a mold you can trust.
We Machine Molds the Right Way — So You Produce Parts the Easy Way
At Huawei Product Development Industrial Ltd, we follow this rigorous process for every single mold—whether it’s a simple 2-cavity cap mold or a complex 32-cavity hot runner system. We believe in transparency, quality, and reliability:
No shortcuts in machining or materials.
No hidden compromises that risk your production.
Just a well-made mold that runs reliably, cycle after cycle.
Need a High-Quality Mold? Let’s Get Started.
Send us your part drawing or sample today. We’ll provide you with a clear machining plan, transparent quote, and guaranteed delivery date—so you can get your production up and running faster.
Contact Us: